A few days ago I was thinking that I never got a Raspberry PI. I always had a look at those but never considered them powerful enough for what I do. However, now that the raspberry PI 4B 8GB is out, and Ubuntu Budgie released Alpha1 of Ubuntu Budgie 21.10, I thought it was time to finally jump in and check it out.
Project idea and overview
I really like a nice and tidy setup, with good cable management. Looking around in my geek lair, I realized I had an old 23″ monitor, FullHD, that I no longer had a use for. And that monitor came with VESA holes. And that’s when I had an idea. Why not make a DIY All-In-One desktop, based on the raspberry PI 4B and Ubuntu Budgie? Wow, that sounded fun.
This is what I am going to do: a DIY AIO computer with Raspberry PI 4B_8GB and of course, I am going to use Ubuntu Budgie with it. If you like the idea, stay with me, I am going to show you what to do to get this project completed in no time, and with little cost.
Shopping list
First of all, the fun part. It took me some time to get all parts together:
- Raspberry PI 4B 8GB
- 128GB class10 microSD
- Original power supply, USB-C, 3A, black
- microHDMI to HDMI 50cm cable
- Aluminum case with VESA mount
- VESA adapter from 7.5cm to 10cm
- Extra large heat sink with fan
- FullHD webcam
- Bluetooth small keyboard and mouse
- 10 meters of spiral wrapping band
- Black zip ties and velcro
Hardware setup
Hardware setup is nice and easy, compared to assembling a full tower PC. You can see some pictures of my setup.
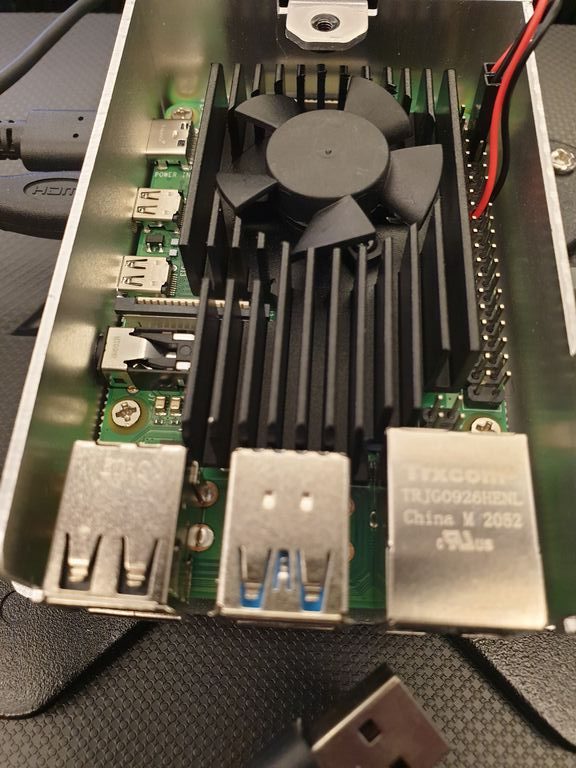
Heatsink and fan combo installed 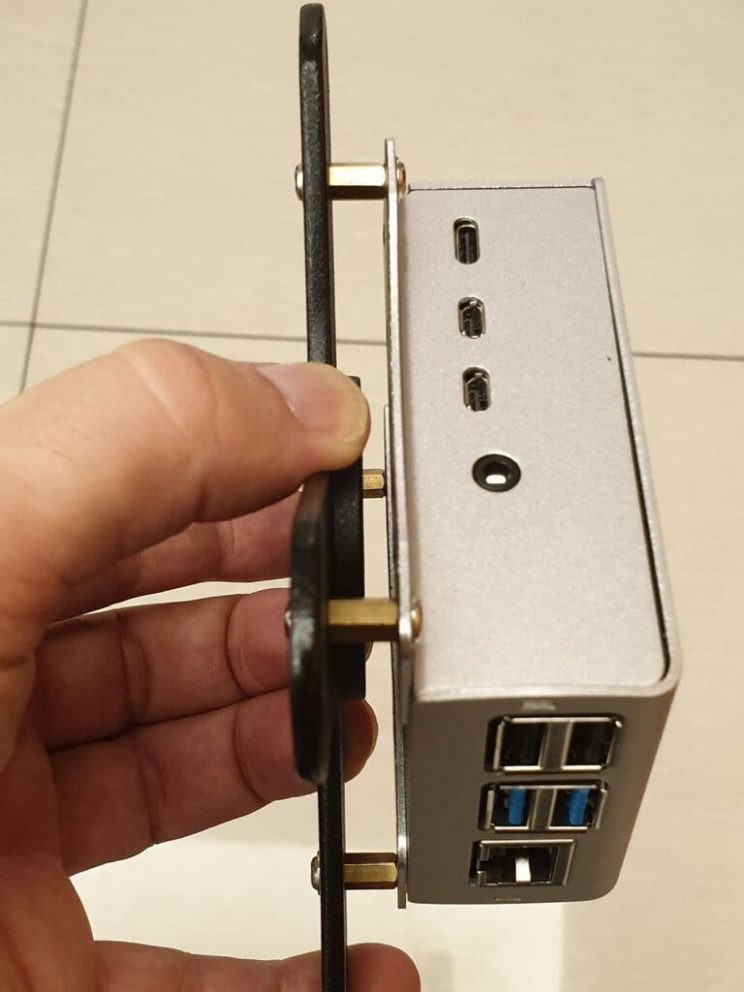
Aluminum case mounted on VESA adapter, added some spacers for better airflow. 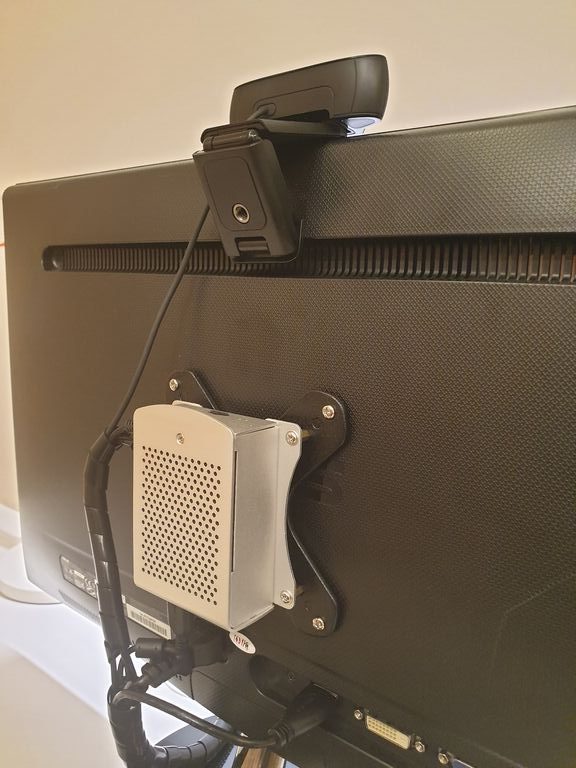
RPI mounted to monitor VESA mount, and cable management done. 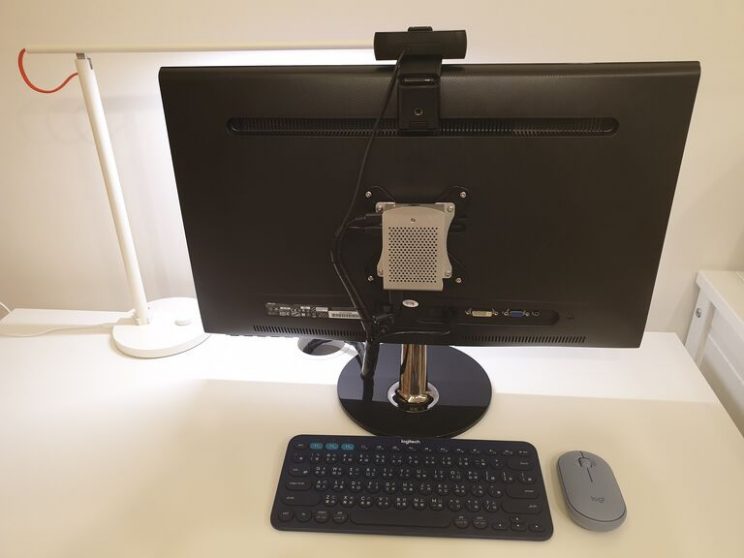
Final view from the back
I had so much fun and this overall was so much cheaper than any other PC I ever had. Is this going to be any useful? Let’s find out!
Ubuntu Budgie install and tweak
First of all, we need to download Ubuntu Budgie ARM 21.10 from this location:
https://sourceforge.net/projects/budgie-remix/files/budgie-raspi-21.10/
NOTE: If you prefer a stable relase, you can download Ubuntu Budgie ARM 21.04 from this location:
https://sourceforge.net/projects/budgie-remix/files/budgie-raspi/
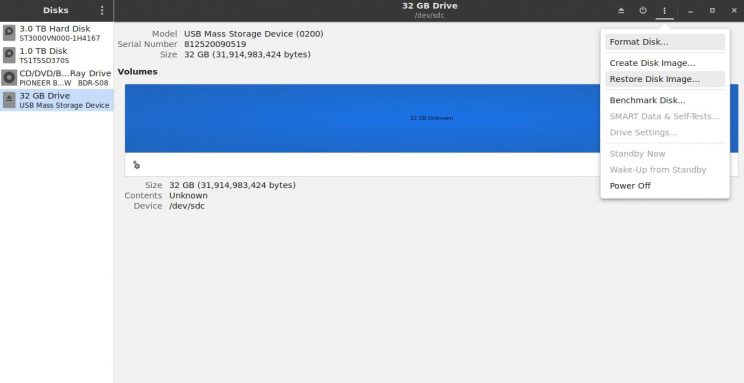
Then, extract and burn the image to microSD card, using “Disks” utility in Ubuntu Budgie:
- Insert microSD
- Open “Disks” utility
- Select microSD card
- On top 3 dot menu, select “Restore Disk Image”
- Browse to Ubuntu Budgie ARM 21.10 image, select and confirm
First Boot, and system optimizations with Budgie ARM TweakTool
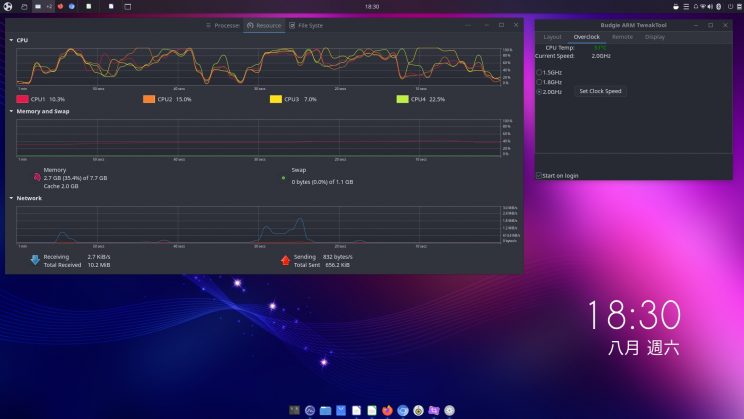
First boot might take a while and that is to be expected. On login, Budgie ARM TweakTool opens up automatically. well, how to say no? Time for some tweaks! Let’s open Budgie ARM TweakTool, and see what we can do with it: Layout options, Overclock, Remote, and Display. Sweet! Our Sam and David really did a great job with this.
Budgie ARM TweakTool – CPU Overclock
First of all, we are going to overclock the CPU. I got that massive heatsink, fan, and aluminum case for that reason. From the Budgie ARM TweakTool, select “Overclock” Tab, and select 2.0Ghz. Apply by clicking on “Set Clock Speed”.
Budgie ARM TweakTool – GPU Memory
What else can we do? Assign more RAM to the GPU. That sounds useful. Select “Display” Tab – GPU Memory, and select 512MB memory. Apply by clicking on “Update Memory”.
Other optimizations: ramdisks and preload
Next up, we are going to speed up our system and extend our microSD card’s life by using our 8GB of ram as much as possible. This includes moving some parts of our filesystem in ramdisks, and using Preload to speed up our system a bit.
RAMDISKS
First we are going to move our temporary folders and logs folder to ramdisk. Ramdisks are basically filesystems created in ram. They won’t wear down our microSD, and they are super fast.
The catch is, everything there is lost on reboot. In our case, we don’t really care. /tmp and /var/tmp are temporary folders and they are not really meant to store anything important anyway.
/var/log is actually one of the places where our operative system writes all the time, and I want to avoid that. Typically I don’t want to move my /var/log to ramdisk on servers. But honestly, I don’t really care to check my logs after reboot on this desktop machine. There are other solutions that use rsync to write the logs back to microSD, but I find it is not really needed in my case. And If I have to troubleshoot some ongoing issue, I can always comment the line in fstab and go back to normal for a few days.
Let’s edit our fstab first and add the lines below.
nano /etc/fstabAdd the 3 lines at the end
tmpfs /tmp tmpfs defaults,noatime,nosuid,size=500m 0 0
tmpfs /var/tmp tmpfs defaults,noatime,nosuid,size=500m 0 0
tmpfs /var/log tmpfs defaults,noatime,nosuid,mode=0755,size=500m 0 0
NOTE: size=500m means each ramdisk is limited to a maximum of 500MB of ram used. It is not going to use 500MB of ram on system start though, so higher values are safer in my opinion. We have plenty of ram on this Raspberry PI 4B 8GB and Ubuntu Budgie is quite lightweight.
Preload
Next, I really want to make good use of all that ram to speed up the system a bit. Preload will learn libraries and applications I use the most, and load those in RAM when we boot our systems. Sure, there is a tradeoff, reboots will be slower. But using the system will be a bit faster. Since I don’t really plan to reboot all the time, I take this as a win.
First, Install preload.
sudo apt-get install preloadOnce installed, let’s go and change some of the settings to make it a bit more aggressive loading libraries and applications in ram. You can find the changes I made below here. I am still experimenting with it, so feel free to leave defaults or tweak as you prefer.
Let’s open preload configuration file.
sudo nano /etc/preload.confThese are the lines I modified, so far I am quite happy with the results.
minsize 100000
mapprefix = !/var/log;!/dev;!/var/tmp;!/tmp;/
exeprefix = !/var/log;!/dev;!/var/tmp;!/tmp;/
autosave = 360
sortstrategy = 0
Reboot and test
That should be enough tweaks for now. Time for a good old reboot. Fingers crossed. After reboot, let’s have a look around and see if any of the changes were applied.
Checking CPU and GPU settings
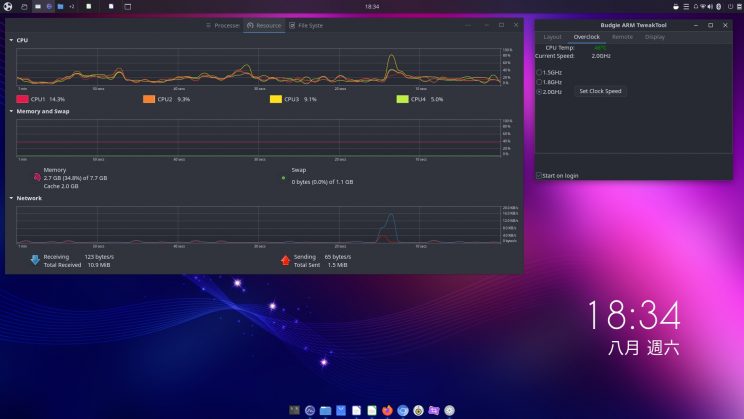
From Budgie ARM TweakTool, I can see that my CPU is now running at 2.0Ghz and temperatures are still quite low. This is thanks to the big heatsink and fan combo, the nice aluminum case that acts as another big heatsink, and allows for good airflow.
Checking ramdisks
Let’s see if our ramdisks have been created, are running and what the used space for each one is.
df -hI can clearly see that /var/log , /var/tmp , and /tmp are now in ramdisk (tmpfs), and that they are only using around 1% of max space:
Filesystem      Size  Used Avail Use% Mounted on
tmpfs           738M   13M  725M   2% /run
/dev/mmcblk0p2  117G  9.8G  103G   9% /
tmpfs           3.7G   38M  3.6G   2% /dev/shm
tmpfs           5.0M  4.0K  5.0M   1% /run/lock
tmpfs           4.0M     0  4.0M   0% /sys/fs/cgroup
tmpfs           3.7G     0  3.7G   0% /run/qemu
tmpfs           500M  740K  500M   1% /tmp
tmpfs           500M  396K  500M   1% /var/log
tmpfs           500M     0  500M   0% /var/tmp
/dev/mmcblk0p1  253M   96M  158M  38% /boot/firmware
tmpfs           738M  168K  738M   1% /run/user/1000
Checking disk I/O
I also want to have a look at disk writes using glances and iotop. I see reduced activity in my microSD I/O. You can install those easily in Ubuntu Budgie.
sudo apt-get install glances iotopConclusion
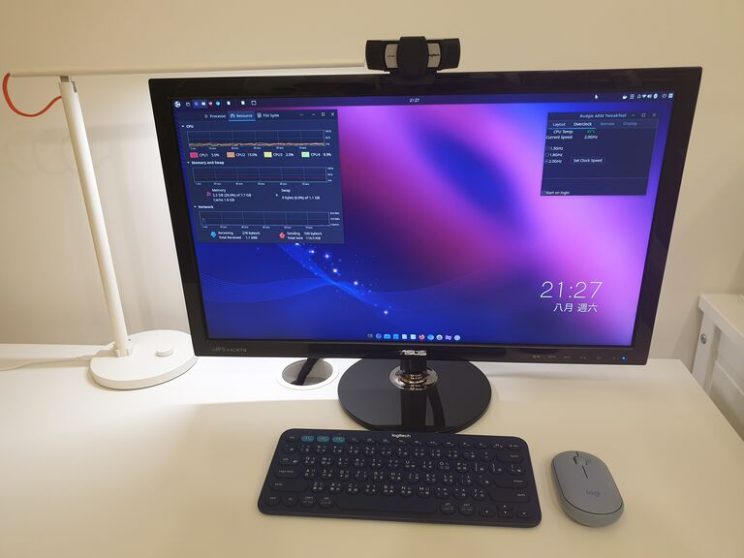
Victory! Everything works fine, my system is doing way less writes to disk, and overall feels faster loading the applications I use often. I have to admit, I did not expect this would run as good as it does. I find its performance to be acceptable for everyday use. It is very cheap, it uses very little power, and it is super quiet. Plus, it runs Ubuntu Budgie, what can I ask more?
Special thanks to Sam and David for delivering this amazing Ubuntu Budgie ARM. I love it!